fredag den 1. januar 2016

Happy New Year - Steampunk with DecoArt


As SanDee&amelie's Steampunk Challenges have the great honour and pleasure of having gained DecoArt as their "one and only" prize sponsor from now on, the whole team decided to put a special spotlight on some of the fabulous products from their wide range of media and paints.
So this month each DT member did not only use DecoArt paints and media on her DT project, but also introduces to you more closely one of the products she has used.

DecoArt Sponsor Badge

I've decided to use DecoArt media to transform one of my photos printed in black and white on my laserprinter to a photo that is looking aged and old.


DecoArt media Matte Medium, DecoArt media Fluid Acrylics Raw Umber and Quinacridone Gold.


Cut the picture in photo size, and then apply it the first layer of Matte Medium.
Let it dry


Then sand it with coarse sandpaper on the edges and slightly on some spots to make it look used and worn. Apply second layer of Matte Medium and let it dry.


Give it some wrinkles in the corners or where you think the photo might have got bruises and damages in its life.


Apply the third layer of Matte Medium, and let dry.


I've mixed Raw Umber and Quinacridone Gold with water to a thin solution, and in a brownish color that I think will make the photo look old.


Paint it with the your solution, and while still wet remove some of the paint with a soft cloth. Rub with your finger some of the paper to give it a worn texture. I've done this in the upper right corner, and painted the rubbed spot again.
Apply the forth layer of Matte medium, and let dry again.


Here you see it in whole with my last embellishments... and after the fifth layer of Matte Medium.


The four corners with their damages and injuries.


I've put the photo into my size A4 black journaling book.

I'm fond of distressing, and DecoArt's Fluid Acrylics are very ideal, because they dry quick, are translucent and together with DecoArt Matte Medium give a great matte finish, that I prefer for my projects.

When you participate in SanDee&amelie's Steampunk Challenges, you will have the opportunity to win this fabulous DecoArt media prize bundle


Happy New Year to you all.
I look forward to be seeing your project on SanDee&amelie's Steampunk Challenges.

Thank you for visiting my blog.
Hugs, Susan

mandag den 21. december 2015

Christmas card from me to you - 2015


Hello my good readers, I hope you will get a wonderful Christmas holiday.
I and my family will enjoy Christmas and New Year together. My year has been exciting, I'm DT on two good teams SanDee& amelie's Steampunk Challenges and as a new on Rubber Dance Stamps Scandinavian blog. There have been real good challenges on both blogs and I hope to see you soon in the new year!


I wish you all a Merry Christmas from Copenhagen
Hugs, Susan


tirsdag den 15. december 2015

Art*Journal*Journey - December 2015 - Collage

I must admit that I have very much scrap on my worktable, but where do I start and where do I end?? Or am I just bad to throw things out ??
It has not come to very much scrapping on this journal page, 
but a little is also good.
Now, I wish you all a happy and creative Christmas. Thanks for the great attention you have shown on my blog.


Thank you for visiting my blog, I wish you a merry Christmas
hugs, Susan


Link to Art*Journal*Journey - December - Collage

lørdag den 12. december 2015

Tim Holtz 12 Tags of 2015 - December

So is the last Tim Holtz Manila Tag for 2015 made. I have followed TIm's tutorial, and I think it's a good way to end the year. 
This year has gone quickly and there have been many challenges.
Tim and Mario must have many thanks to be still going strong and come with all their new ideas. Thanks for a great inspiring year.


I used Tim Holtz 8 # manila tag, stencil flourish, bow-tied, festive greenery and shape strips dies. Small talk occasions, mirrored stars, distress spray stain fired brick. Distress ink ground espresso, mowed lawn and vintage photo.
Nostalgic collection paper.
From the stash canvas, gesso, jute string and sewing thread.


Thank you for visiting my blog and I wish you the loveliest Christmas Eve and Christmas holidays. Many Christmas thoughts to you all
hugs Susan


Link to Tim Holtz Tags of 2015 - December

fredag den 11. december 2015

December sneak peek - Rubber Dance Stamps


Hej alle mine gode læsere, her er en sneak peek på mit indlæg på den Skandinaviske blog. Husk at deltage i nov/december udfordringen, på den internationale Rubber Dance Stamps blog. Du har mulighed for at vinde for over 200,- kr. fra webshoppen Rubber Dance Stamps.

Husk! At du kan få 15% i rabat på din ordre hvis du bruger koden susan2015.

Tak for dit besøg på min blog og jeg ønsker at du må få en rigtigt god jul.
Kram, Susan


Hello all my good readers, here is the sneak peek for my post at the Scandinavian blog. Remember to participate in the November/December challenge at the International Rubber Dance Stamps blog. You will have the opportunity to win a pile of stamps worth over 30$/25 euro from the webshop Rubber Dance Stamps.

Remember! That you can get 15% off you order if you use the code susan2015.

Thank you for visiting my blog and I wish you a real nice Christmas.
Hugs, Susan

lørdag den 5. december 2015

#2 Birch Christmas Tag

I was very inspired by Claudia's tutorial on Our Cerative Corner

Claudia's blog is worth visiting so here's a link vonpappell 

I have lots of old cernit clay leftovers from when I made dollhouse thing.
I started to roll and model.

The holes that you see is for cord suspension, but I had to find another way to get it to hang. *LOL* (angel wing upside down).


I am very pleased with DecoArts products and I have used
Weathered Wood Crackle Medium
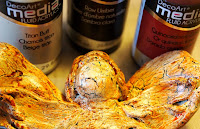
DecoArt media Fluid Acrylic Titan Buff, Raw Umber and Quiacridone Gold
I came the crackle on the cernit clay first, because it was dark, and it was enough with one layer Titan Buff on the top. To achieve the old look,
I painted with Quiacridone Gold.


I used a birch plate and cut it into a tag size.


The angel had paper thrown around the body (a paper I have had for years), little tulle, rusty ring for the halo and silk ribbons.


Now my tag is ready to hang on the Christmas tree.


It fits nicely with my first birch tag that I had created for SanDee&amelie's Steampunk November/December Challenge


Thank you for visiting my blog and I wish you a good Christmas time
Hugs, Susan


torsdag den 3. december 2015

PaperArtsy Masterboads - Topic 22 2015

PaperArtsy Masterboard challenge is really exciting and I have let myself be inspired by Chris Cresswell. It was especially the fine girls who started my imagination.


First I began my masterboard and painted it with a brush, you can see I made two boards which I was very happy with. 
The first one is painted with acrylic colors from Dylusions in my black Moleskin that is size A4. It's stamped with white acrylic color using Andy Skinners stamps.


The other (A4 white paper) masterboard is in bright colors also Dylusions colors, stamped with green acrylic color using Rubber Dance Stamps Pines Fir Yew 
I will definitely use this masterboard for some Christmas cards.


Here's my girl painted in acrylic colors and colored with Prismacolor and outlined with black ink, charcoal and stamped with a small floral motif on the girl's dress.


Thank you for visiting my blog and I wish you a really good Christmas month
Hugs, Susan


Link to PaperArtsy Masterboards - Topic 22 2015

tirsdag den 1. december 2015

Steampunk/grunge Christmas Tag - SanDee&amelie's Steampunk Challenge

Don't miss our two-months long winter special challenge 2015.

My husband finds the strangest things for my scrap work, here it is birch bark plates !! I thought that I'd never need. But they had tags format and here you see how.


I always have a lot of white paper of choice before I go started with the creative, and before I know what it will become. But it should be Christmas ...
I cut corners and made a hole for the silk ribbon on the birch bark.
The ornaments have as the first layer black gesso, afterwards crackle medium, on the top I painted with titan buff to get it crakle. For the old look there comes diluted quninacidone gold on. To seal the hole painted ornament, matt medium.


I have used
DecoArt Media White Modeling Paste, Matte Medium, Black Gesso
Americana Weathered Wood Crackle Medium
DecoArt Media Fluid Acrylics Titan Buff, Quinacidone Gold
Andy Skinner Stamp


Distress ink fired brick, black soot
Distress stain spray fired brick
Distress marker black soot
Carved ornament #2, retro ornament dies
Kraft - Core metallic collection
Inka Gold lavared, Prima Stickers
Silk ribbon, jute yarn, decor leaves and birch bark. White Cardboard.


There are made two small holes in birch bark, to pierce the ornaments jute yarn through so that they can be pulled off and hung on the Christmas tree or a troll branch.
It is hard to see on the photo but there is gold behind the word LOVE, and the back has got the same treatment as the front.


I imagine that I had found these old ornaments in my grandmother's attic...
I hope you enjoyed my Christmas birch bark tag.


Thank you for visiting my blog and have a good Christmas month.
Hugs Susan
Related Posts Plugin for WordPress, Blogger...